So, today at about 11:15 a.m. we will hit our 19th year together…
I feel this urge to go on and on with words of wisdom and advice for all of the folks who are choosing to get married, but I also think I can be concise and simple.
WTL would say, as he often does, “Marry your best friend.”
I agree and add, ” Appreciate every day with your chosen person, and tell them.”
2017
2016
Ghostly Pair…photo by Jared Young
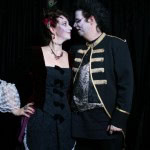
King and Queen – White chess pieces…photo by Jared Young
And make the time and effort to do fun sh!t together!
I tried adulting and it was fun, but I’m going back to my happy place now.
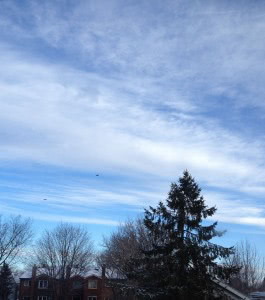
The view from my home studio window
My “ambition” when I first decided in Grade 10 that I would become a fashion designer/ couturier/ sew for a living was to have a comfy home studio and work from there.
My vision involved a house rather than an apartment, but I like living downtown in Ottawa, so apartment living it is.
Since I moved into our present apartment 2.5 years ago, I’ve been trying to reconfigure my studio situation. For 17 years, I had the perfect layout, but that apartment building became a chaotic landlord mess and we moved. I share our large open living/dining area with my husband’s office and our living room. It works, but I’m still finding the best layout.
When given the chance to work in house with Luxe, I took advantage of the offer. and things evolved through a few incarnations, with constant changes, but no steady need to have fittings in huge gowns in my home space.
Fast forward to June 2016, I had signed a short term lease on a studio space in Mooney’s Bay area that worked well with Luxe brides, for whom I was providing alterations services.
The store closed in July.
Without missing a beat, my clients continued to come to me at the Ridgewood/ Mooney’s Bay studio location and some found it wonderfully convenient.
But things continue to change and evolve.
I was approached by another bridal salon to assist with their growing alterations aspect and they are SUPERCLOSE to my home studio. While it’s still early, I am cautiously optimistic. The work lining up for 2017 makes it logical to stay in my home space and focus on the sewing.
Something I can mention now – the business I was subletting from, came to let me know they were closing and my lease would be ending in early 2017 from their time frame. And with a 30 day notice in our agreement, I had a week to consider my options – but mostly “when” would I move home.
Thus, on December 1, I gave my notice and scheduled my move during the holiday break.
I don’t enjoy moving, but I am looking forward to coming back home!
I’ll be taking some time off from sewing from December 23rd to January 3, for both family holiday stuff and actually moving and resettling.
Please keep me in mind for your colourful design needs – I’ve been SO HAPPY designing new pieces for clients this fall in bright glorious colours! I want to keep that flowing while I still help brides in their white and ivory dresses look gorgeous!
Pre-Halloween 2016 and my Husband and I having the usual discussion,
“What do you want to be for Halloween?”
” I dunno, what do you want to be?”
And so it goes, for about 2 weeks until finally an idea pops into his head and he says it out loud.
Background: We have been attending the same extended community event for 20 years now, and we tend to try to go with the theme of the evening and be creative. For 10+ years of attending the Annual Witches Gathering Charity event, we have been judges and for the past 2 years we decided to take a break.
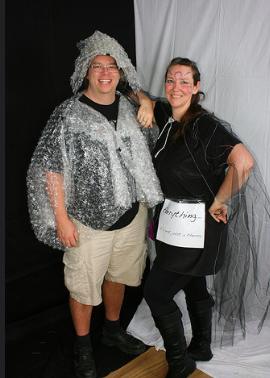
In 2015, the theme was Dancing Between the Worlds and we went as Quantum Foam and String Theory:
We were told it was a bit too esoteric for the first year as not judges.
Previous years, we were judges in these:
Ghostly Pair…photo by Jared Young
King and Queen – White chess pieces…photo by Jared Young
So, on to this year’s theme:
To the Bottom of the Sea…
Tom’s idea: Anglerfish
And the research part of this adventure began and I called it #myscienceproject.
I looked up images and realized there were so many different types of Anglerfish, I could be totally creative.
My Inspiration
Now, it’s also a couple costume, so I started to research the appearance of the male versus female and learned a whole new batch of information.
The Oatmeal describes it best – please check out : Go there and come back! After you finish laughing…
Okay, Are we back now?
Once I decided on a general concept for the female Angler Fish – Angela, I started to research construction methods and found an amazing number of Angler fish halloween costumes out there already. Go google Angler Fish costume images after you are done here!
Once I clarified whether he wanted it on his head or torso, I could choose what size to make her and construction began. I was so pleased that we had just received a new couch and had packing cardboard available, as well as many shipments from a certain online company that packs their cardboard boxes with oodles of brown craft paper – which I keep and use for patterns mostly – provided me with lots of clean paper to use with my chosen method:
papier mâché
pa·pier mâ·ché
ˌpāpər məˈSHā,päˈp(y)ā/
noun
a malleable mixture of paper and glue, or paper, flour, and water, that becomes hard when dry.
“George was constructing a crocodile out of papier-mâché”
Origin: French, literally ‘chewed paper.’
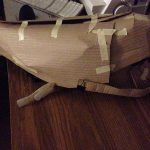
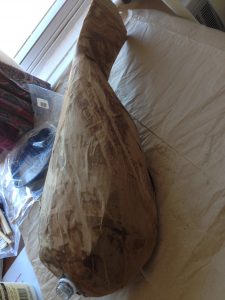
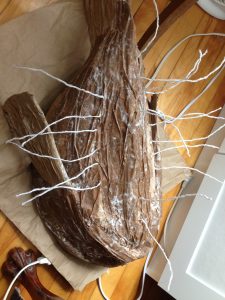
Step 1 – Create a cardboard skeleton:
I sew for a living – you may have guessed that – and I like to “drape” when I create original pieces , so I pretty much draped the shape and cut away cardboard into darts to curve it, and used mostly masking tape to “baste” it together for the first fitting.
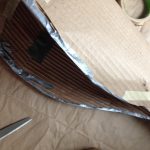
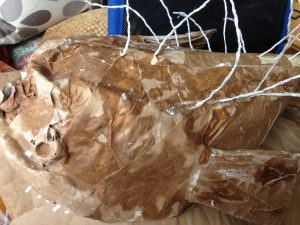
Step 2 – Add some extra support pieces as needed:
I added wire to the bottom to help me have a defined edge and used duct tape to hold it in place – this is a hat making skill that normally includes stitching the wire in place with a blanket stitch and then adding a bias wrap to hold it smoothly in place. I swear. #millineryskills
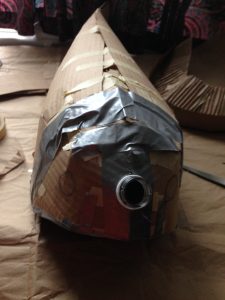
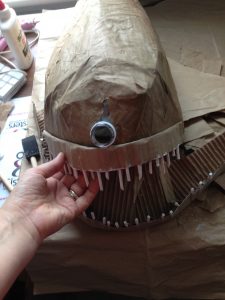
I also added a bit more duct tape through the seams and started prepping it for the embellishments:
The lure mounting was the top segment of a 2 litre pop bottle.
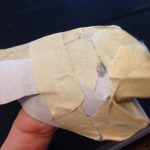
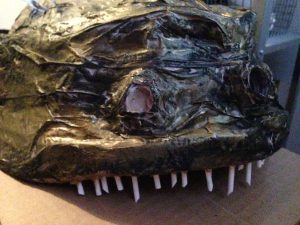
The separate lower jaw, I created by folding the corrugated couch cardboard – which gave me the perfect base to insert the dowel teeth. The dowels were small diameter craft dowels that I could cut with my power cutters < stronger than scissors>, and I inserted them into the tunnels in the corrugated cardboard. For the upper teeth, I created a narrower version of the folded over jawline and did the same thing.
The spines I created by hot gluing super fine wire to white yarn.
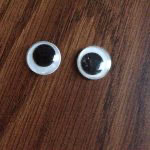
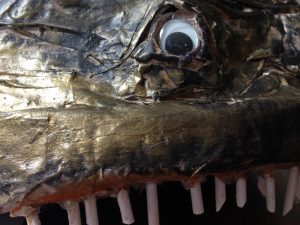
The eye sockets were created by gluing two safety seals from the inside of juice cartons onto the body – I was able to get eyes that fit exactly into the perfect circles created by the seals, but if I had not, I was planning to fill the seals with hot glue and have translucent eyes.
I did have most of the structure as solid as possible with tape before starting the paper and glue/ paper and flour steps, so the first layers were strengthening and building up of features.
Step 3 – getting messy:
The recipes:
Day 1:
half glue, half water.
The first layer I did with white glue and water – I found the plastic tray from a frozen dinner was PERFECT as a tray – it’s big enough to run the strips of paper through it and was just the right size for making a good amount of mix. Most recipes online tell you to only make enough paste for one go at a time. This was the perfect amount and sized – just about 3/8 inch depth in the tray gave me enough paste to do a first layer and that dried family quickly.
So Smooooth now!
Day 2:
1 cup flour, enough water to make it a paste the consistency of crepe batter.
Again, I used the tray and a small whisk to make it smooth. The brown paper works great to sculpt the extra thick parts and I keep the lower jaw and fins separate so I could work on the body, put in front of the window with a fan blowing on it while I worked on the jaw, and fins, and switch as needed.
Once I had built things up to my liking for musculature, I let it dry overnight and the following day I created the skin texturing with a final layer of paper and flour mixture. Scrunching the paper creating vertical lines along the length of the body and fins gave the look I wanted.
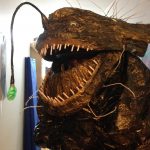
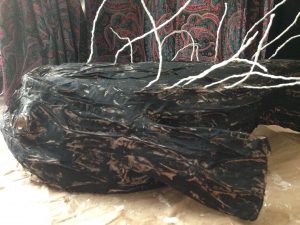
PAINTING!
Acrylic craft paint worked great and I used sponge brushes to get the base black on.
As I was applying the black, I realized that I would not be able to easily get into every crevasse of the folded paper so I just went with it. The colour of the Anglerfish is either dark brown of grey, and this was creating a great version of it by having the brown craft paper texture offset by the black.
I then added metallic gold to give it a great sheen and added depth and reflection.
The teeth I painted plain white – keeping it simple. and I added a line of hot glue around the teeth after the painting, to keep them stable but also added an extra layer of texture and wetness to the jaw.
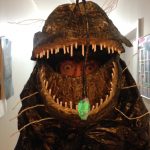
Finally, I added a thin coat of orange glitter paint – it was what I had – to the inside of the mouth. Cool, eh?
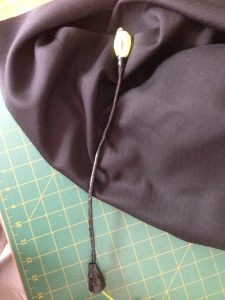
The lure was created with lighted wire from my hubby, that has a power pack for lighting it. I rolled it into a ball, inserted that into a small plastic bag, tying it with a twist tie. I wrapped about 10 inches of the light in paper and taped that into a flexible tube with duct tape and then wrapped the entire segment in electrical tape. I created a tiny cardboard funnel for the end that would insert into the mount and taped it all. a bit of gold paint on the black to blend it in along with some hot glue and there it was!
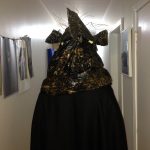
Inside I ran it through a cardboard tube along the “spine” of Angela, and bundled the remaining light cord into a black fabric pocket in her tail. The entire body was them zip tied to my hubby’s bike helmet and some extra duct tape locked it in place.
Super industrial velcro holds the jaw in place to allow some adjusting as needed, and then gold paint on a black garbage bag creates her belly – it’s only on with masking tape to make it quick to remove if needed.
In between the big job of creating Angela, Randy was made from a cardboard toilet paper tube, stuffed with a few cotton balls, held together with masking tape and a couple of layers of paper and flour. I painted him with glow in the dark paint and black . He’s a finger puppet to make life easy for me!
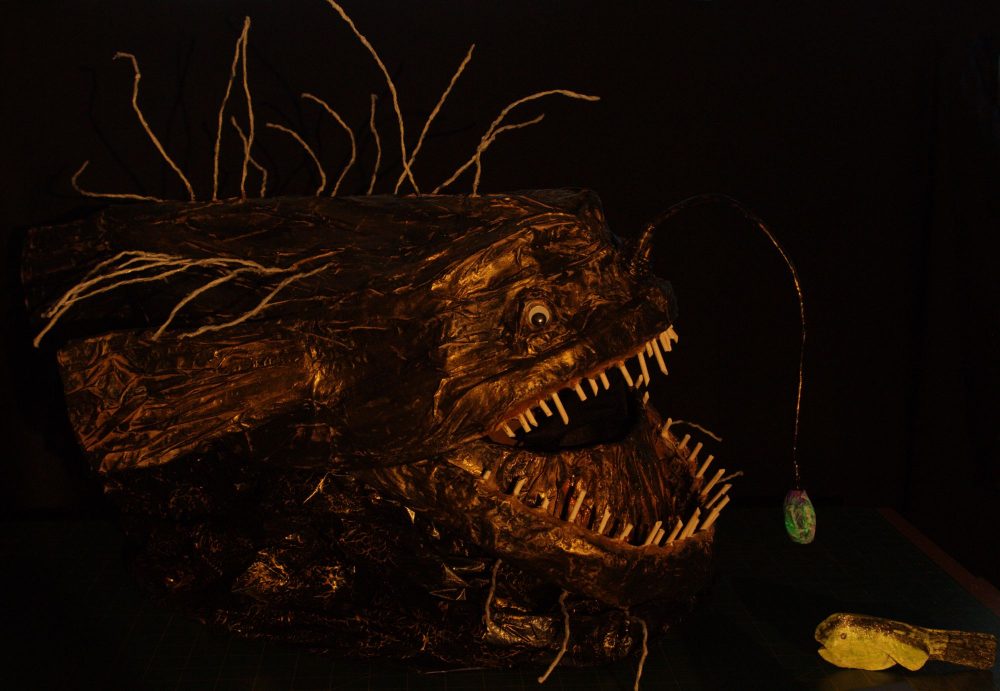
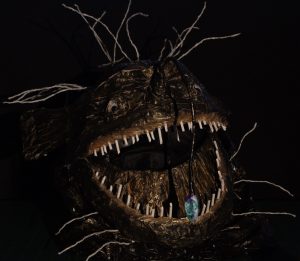
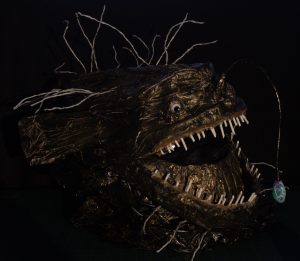
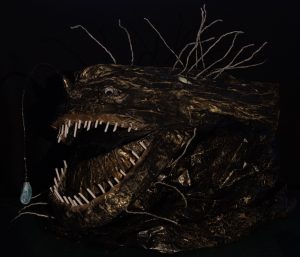
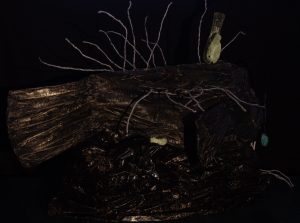
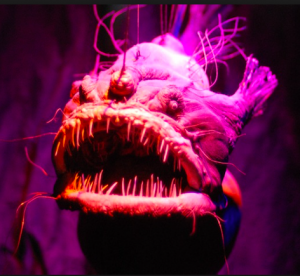
Test shots of Angela once everything was ready:
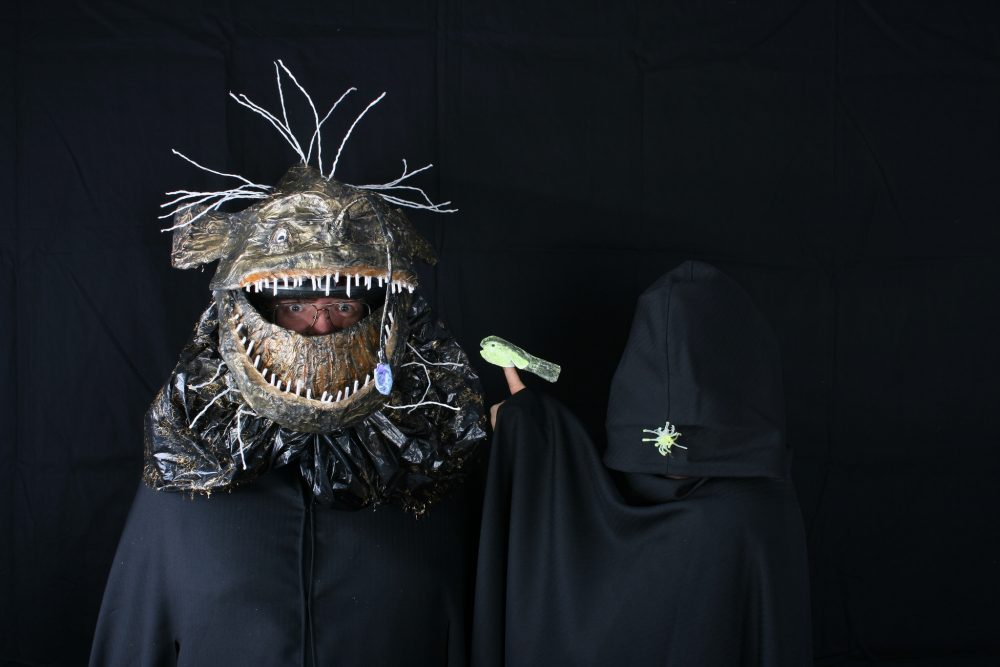
The Glamour Shot of Angela and Randy:
Angela and Randy – Glamour shot! Photo by Darner Media
The Boudoir Shoot by Darner Media:
And finally-
Angler and Randy at the Annual Witches Gathering 2016
I’ve had some very interesting adventures over the past five years as I had wandered into a new realm of wedding dress alterations by the generous invitation of the ladies of LuxeBridal. As I strode boldly into that world, I had to choose how much time I would have to design and create original pieces and how much time I would give to a really steady flow of work and income.
There was an ebb and flow for a while, and then in the fall of 2014, I gave myself over to that path and mainly have been working on white – so much white – pretty, sparkly white, but again, so much white.
And I did so with gratitude and an adventure seeking joy as my background in making garments that are customized both in design and fit, allow me problem solving skills that helped tackle the most interesting challenges!
The journey began to spiral around again to me returning to my natural habitat last winter as the decision to shift back into running things on my own terms was broached, and by June 1st, I had signed the lease on my 2nd studio space, and was gratefully tracking time for myself again.
If I learned anything about working with other people, it’s to let them do some of the work once in a while to allow them the awareness of how much time things can take, and how much attention to detail I can be very OCD about – thanks to Maddy and the ever colourful Laura for the times they helped with the lace! Lisa – she knew better!
And then, mid-summer, Luxe Bridal quietly announced it’s closure and while I am still happily helping out their brides who have not yet walked down the aisle, I know I now am back onto my own track and seeking new adventures in creativity and sewing! But does everyone else know that?
There I was yesterday having had two conversations that brought me up short. I was asked who my favourite designer was – I don’t have one – and I babbled on about how I’m not a fashionista < that skill lies with other folks, including one of my longtime clients who I love to see what she puts together!>. The bottom line for me is that truly, I don’t have a favourite designer. I am inspired by the things that other designers < known or otherwise> do and use that influence to generate ideas and fun for both my clients and myself.
The other conversation began when a client, with whom I am venturing into a new realm again, calmly said, as we booked a number of fittings in order for her new outfit to be ready for her wear date, “I guess you don’t make things from scratch as you mainly do alterations...” , presumable in reference to needing so many appointments.
And my heart broke.
I then had to explain myself. I had to justify the number of fittings I prefer to have in order to ensure all of the details are in place. I had to point out that before 5 years ago, I only occasionally did alterations and mostly MADE dresses, costumes and other exciting pieces. But she only has known me for a couple of years, and had no way of really knowing the depths of my creative powers, because I’ve been focusing them into a very narrow beam
So I realized this morning I wanted to yell to the world –
I’M BACK
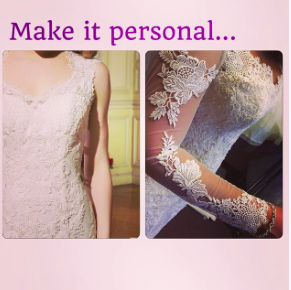
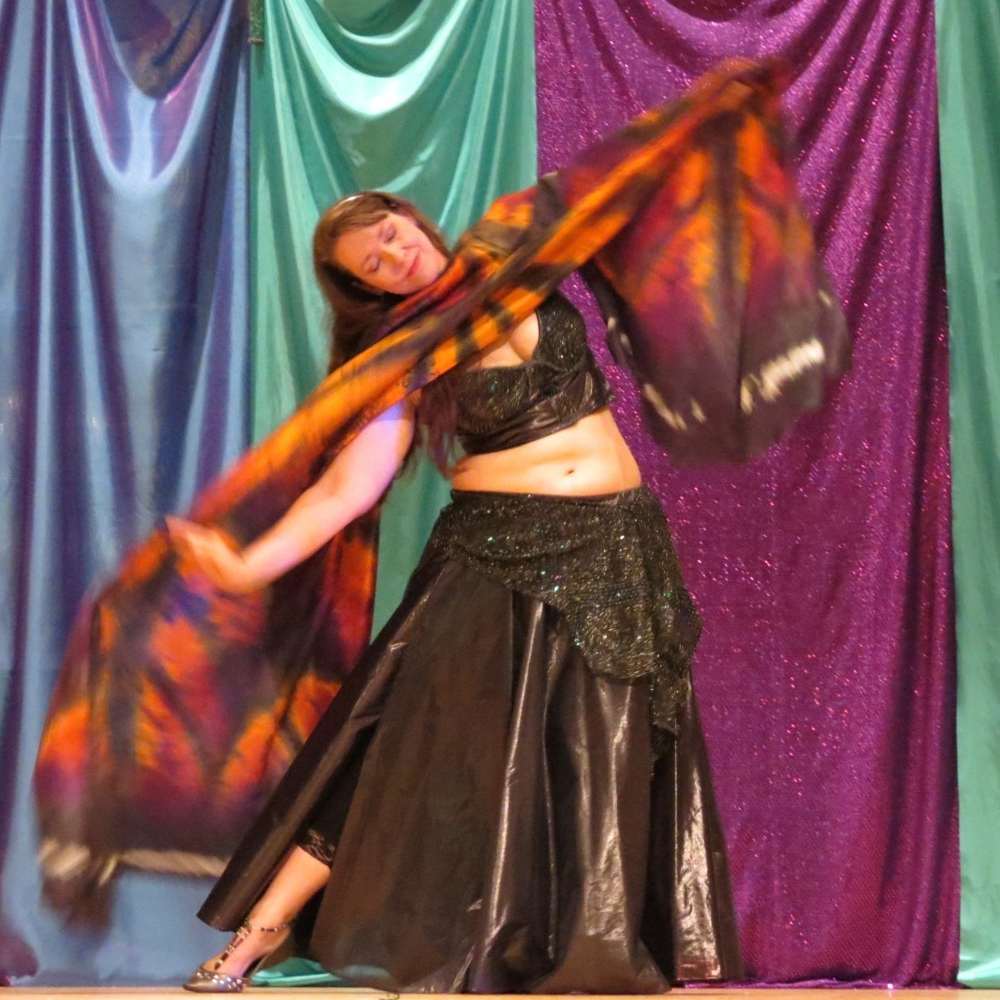
Butterfly veil inspired this metallic taffeta set with hand beading on vest and bra with subtle hip wrap in beaded silk chiffon.
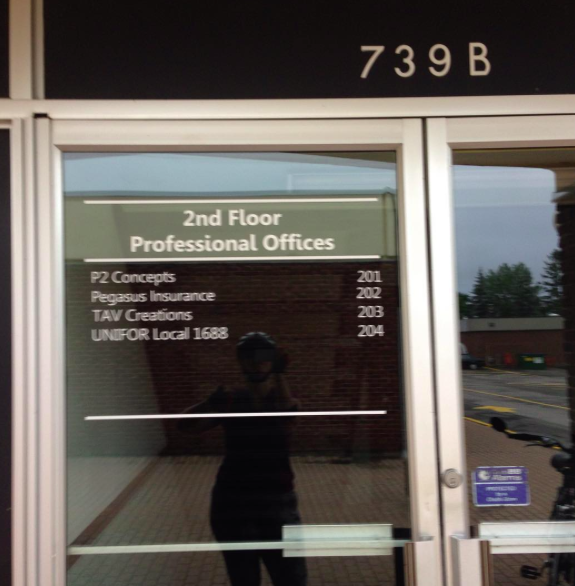
Although it’s in black and white, here’s the sign for the door.
Today, I start paying the rent on the studio space I’ve made my second sewing home since last June! Thanks to the lovely ladies at Luxe for helping arrange the transition to my new adventure!
Still by appointment only, so book me well in advance as the summer is filling up!
I look forward to serving brides, dancers, and other creative souls in both my home studio < with a mascot>, and my new studio at 739 Ridgewood, suite 203, just off Riverside, near Mooney’s Bay, in the strip mall, up on the second floor.
Time to get biking!
Would you like to book an appointment? Contact me either via email – tracey@tav-creations.com or fill this in:
Loads of hand sewing and lots of info bombarded onto students!
IN your world, what’s missing from the “Basic Sewing Kit” – there’s one item I left out to test the students, but what do you have in your basic sewing kit?
Starting January 9th, 2016, at the Routhier Community Centre, I’ll be offering the first of 3 basic sewing sessions.
Come on out and learn the very basics or sign up for the 2nd and 3rd level to get a bit more intricate!
Course Details:
Winter 2016
Routhier Community Centre – 172 Guigues – 613-244-4470
Registration online at ottawa.ca using the bar code and your family pin number and touch tone or during business hours in person at any community centre.
Sewing Level 1:
Saturdays,
Jan 9-23,
10am-noon
$51,
barcode: 983514
Sewing Level 2:
Saturdays,
Jan 30- Feb 13,
10am-noon
$51,
barcode: 983533
Sewing Level 3:
Saturdays,
Feb 20 – Mar 5,
10am-noon
$51,
barcode: 983543
just a simple reminder that there will be some fun soirees in your life in the next 6-8 weeks and you might be almost ready to start looking into that modern dilemma, ” Whatever will I wear?”
If you’ve:
got the perfect outfit, but it needs a bit of tailoring;
you thought you had the perfect outfit, but now you think it could use a redesign;
been gifted gorgeous fabric and now want to have it made into that creative vision;
or just want something new and cannot find it out there already
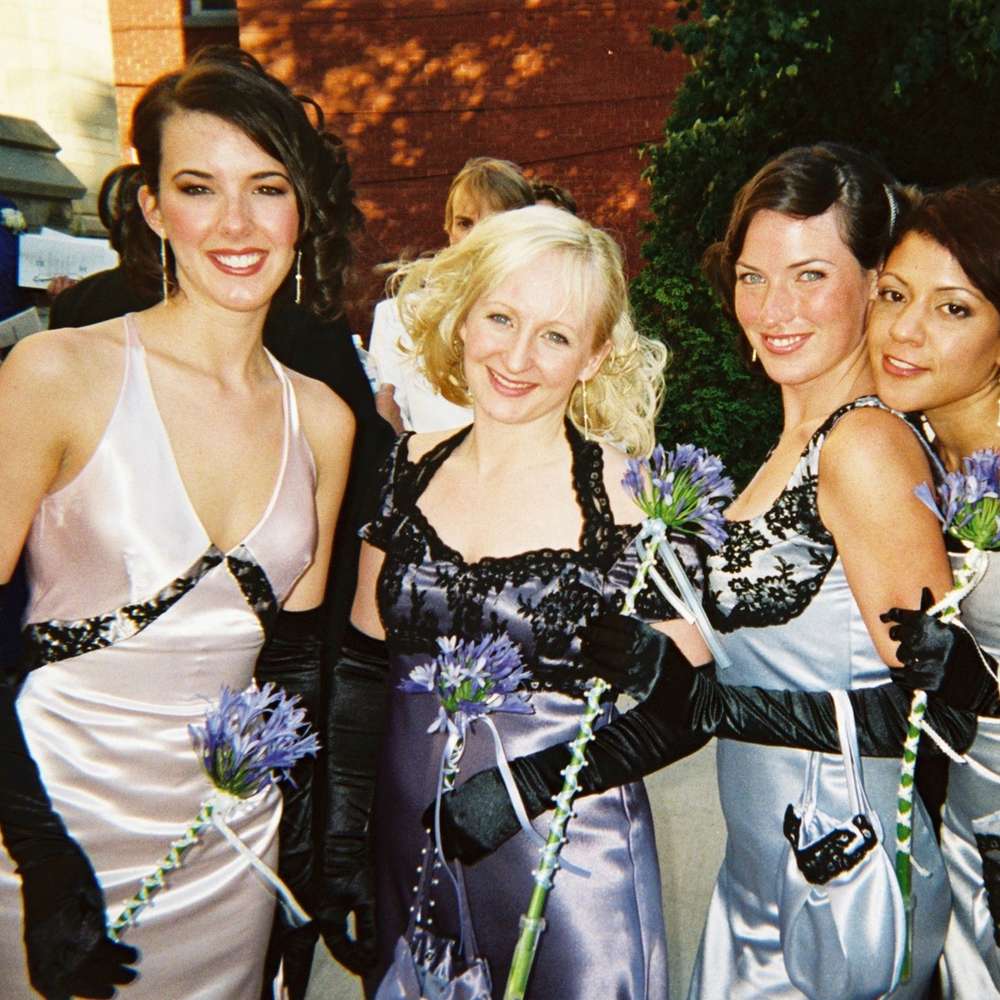
Bridesmaid dresses matching concept and unique for each!
Who you gonna call? < um, sorry, couldn’t stop myself>
Already fully booked this week, I am looking forward to getting back into the swing of things and seeing what pretty garments I’ll be able to play with this season!
I’m off to the Sewing Machine Hospital to pick up my babies – they also had their holiday time!
Fall weddings can be lovely, as can winter weddings so keep me in mind if you are looking for help creating your dream gown or just need some work done on your nearly there dream gown!
And Halloween cometh! Already fielding costume requests, so get your emails to me asap < or use the contact form> to book some time for me to create something funtabulous for ya!
And sewing lessons – learn some of those basic skills yourself!


 Finally, I added a thin coat of orange glitter paint – it was what I had – to the inside of the mouth. Cool, eh?
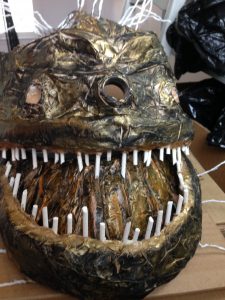
 pack for lighting it. I rolled it into a ball, inserted that into a small plastic bag, tying it with a twist tie. I wrapped about 10 inches of the light in paper and taped that into a flexible tube with duct tape and then wrapped the entire segment in electrical tape. I created a tiny cardboard funnel for the end that would insert into the mount and taped it all. a bit of gold paint on the black to blend it in along with some hot glue and there it was!
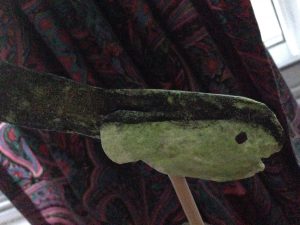 In between the big job of creating Angela, Randy was made from a cardboard toilet paper tube, stuffed with a few cotton balls, held together with masking tape and a couple of layers of paper and flour. I painted him with glow in the dark paint and black . He’s a finger puppet to make life easy for me!